For the longest time, we've been building up this project rifle, and our expectations alike. It started off awkwardly enough, with a used Stevens 200 purchased sight unseen in what was advertised to be .308, but ended up being a .270. We first fitted the action into our Canadian-made TAC-21 chassis produced by Modular Driven Technologies, as there were some doubts about whether or not the Stevens action would work in a chassis designed for a Savage. With the action's fitment confirmed we carefully screwed on a very long and very impressive barrel we bought again used, sight unseen, and off the internet... although this time in the correct calibre. From there we played with rubberized finishes while figuring out what sort of optic to go for, recounted the tale of how we landed on Vortex' excellent Viper PST as our scope of choice, and discussed the proper method by which optics should be mounted.
 And all this time, we never got to pull the trigger once.
Why? Well, because the rifle that was shipped to us had what we will only politely refer to as a severely bubba'd trigger. With one spring missing completely, the various other set screws had to be tightened up to the point that the safety couldn't be engaged, so we simply didn't trust it. Sure, it was a light, crisp break... but it was also sketchy as hell and downright unsafe. So we knew that before we took this rifle to the range for its final testing, we would need a new trigger, and eventually decided to purchase the Rifle Basix SAV-2 trigger kit.
 Now, while there's not as many options for aftermarket Savage triggers than there are for Remington 700s, there are still quite a few. Some are simply the actual trigger itself and just feature a slightly different sear engagement to improve the pull, and others are complete drop-in trigger packages with a new housing and all the various pins and springs required. Since our main problem was missing and otherwise poorly modified parts, we knew we would need one of the more complete kits to address our trigger's problems. And when it comes to those particular styles of triggers, there's really only three options: Rifle Basix' SAV-2 and Sharp Shooter Supply's Evolution and Competition triggers. Slotting between the $110 Competition trigger and $200 Evolution trigger, the $160 SAV-2 features a cast trigger housing (the Competition piece features a milled component that bolts into the stock stamped trigger housing while the Evolution trigger is a completely milled piece) and a myriad of adjustment that is supposedly capable of bringing the trigger pull between four ounces and three pounds. For us, that cast housing made it a relatively easy choice, as it most closely mimics the shape of the stock trigger housing, and we wanted to do our best to avoid encountering any fitment issues with the aftermarket trigger and the MDT chassis.
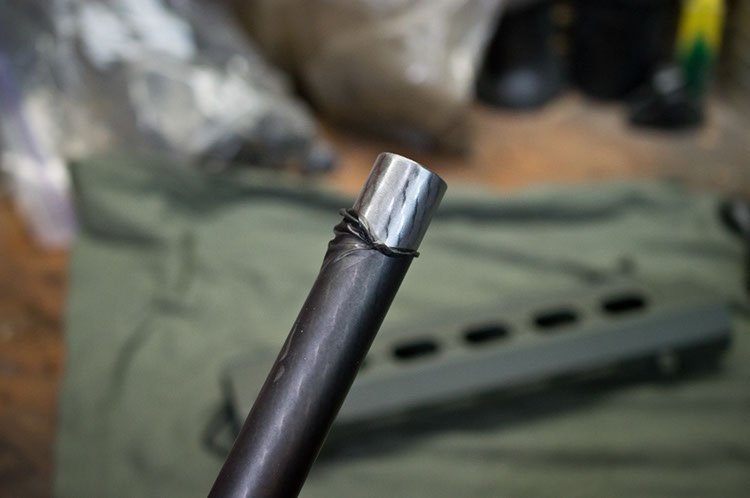 Step 1: Before we could begin, we needed to remove the Plastidip coating the rifle had lived in thus far. After a few months curing time, our probably too-thick coats had left it somewhat tacky, and besides that we knew it would be easier to deal with the frustratingly difficult retaining pin with a clean chassis system. Gratifyingly though, and to the finishes' credit, it did indeed peel off, leaving almost no residue. And anywhere that a slight amount of overspray did get (such as inside small gaps and holes in the chassis), brake cleaner removed it easily.
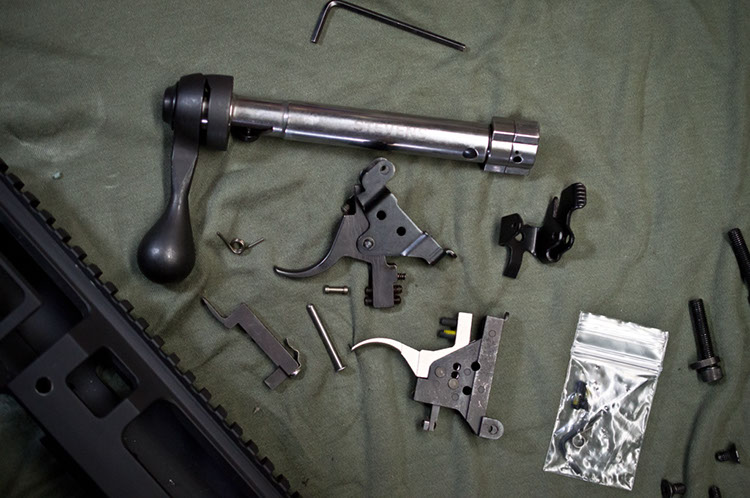 Step 2: Obviously step 2 was to disassemble everything. As you can see in the photos, our stock trigger's sear engagement point had obviously been worked on, and while we certainly were impressed with the break it provided, it simply wasn't safe. Also, having taken a look at the sear itself, we're relatively certain it too was treated to some degree of butchery and at this point in the process were furiously hoping it doesn't create problems with the new trigger assembly. Cue the foreboding music...
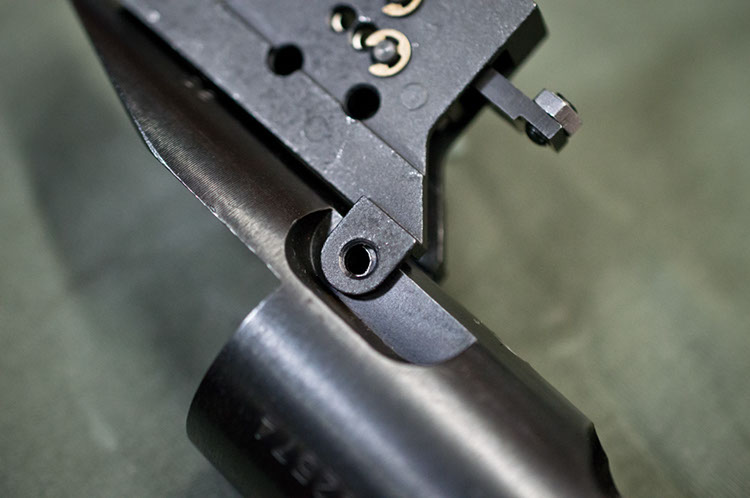 Step 3: In order to fit the SAV-2 trigger assembly, you need to first disassemble it and test-fit the housing to the receiver, as Rifle Basix manufactures the housing with slightly more distance between the rearmost hook that latches on through the safety slot and the hole for the forward retaining pin. They do, however, advise owners remove material slowly as the retaining pin should remain a tight fit. As you can see, ours was quite a far ways off, and meant we spent some time filing to get it to fit.
 Step 4: Once we had the housing pinned to the receiver, we mocked the whole thing up inside the chassis to ensure that the various chassis components would fit around the larger trigger housing. There was a definite sigh of relief when everything fit together just fine. Furthermore, since the leaving the lower portion of the chassis removed keeps all the various adjustments well within reach, we managed to keep the action together while making all the adjustments; a real boon given how much of a chore it has proven to be to remove and replace the action inside the chassis
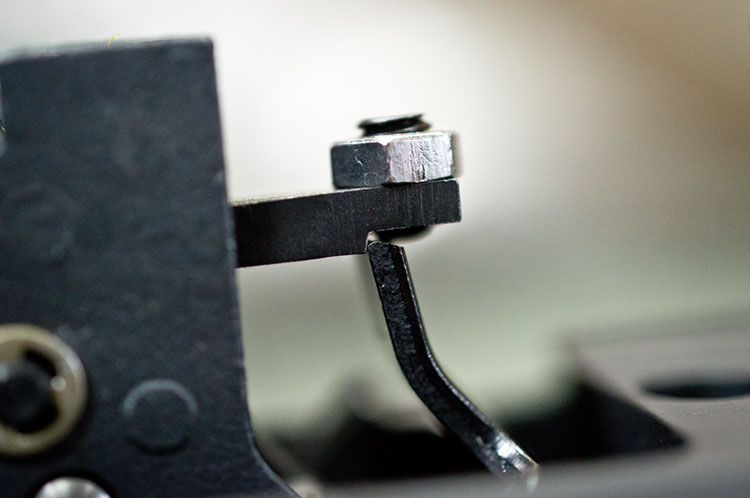 Step 5: Remember that potentially buggered sear that portended future headaches? Here it is, pictured alongside a sear engagement cut on the trigger that we've since come to realize is not cut correctly. Try as we might to sort the engagement issue out with all the various adjustments, this problem forced us to compromise on pull weight and distance in order to get a reliable and safe trigger pull. While is hasn't hampered the rifle's performance, we will be addressing this on our own time because we're OCD like that.
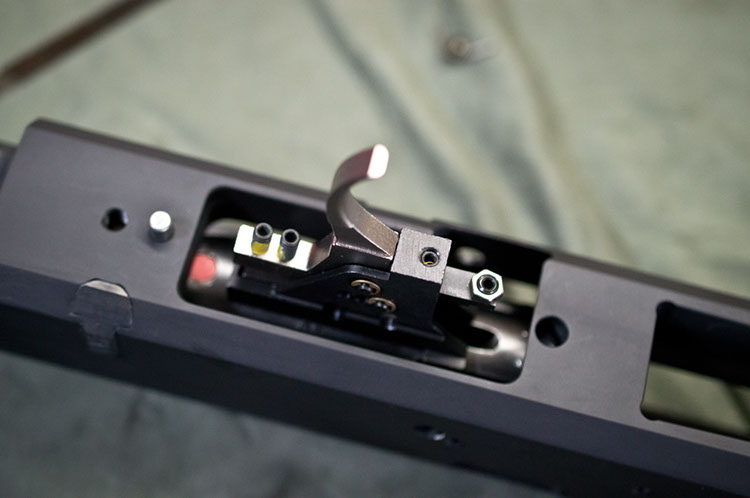
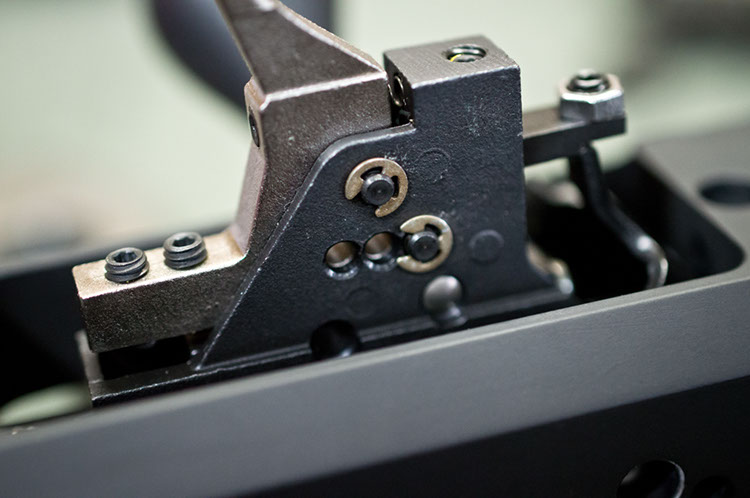 Step 6: A better view of the wide array of adjustments provided by the SAV-2. The trigger ships with a DVD that includes an instructional video on how to install and set up the trigger, but to be honest, it's not very good. Take to the internet or simply sit and puzzle it out, but certainly set aside at least an hour to get the various set screws, spring tension, and pivot positions sorted out. The fact of the matter is, this is not a job for the mechanically disinclined.
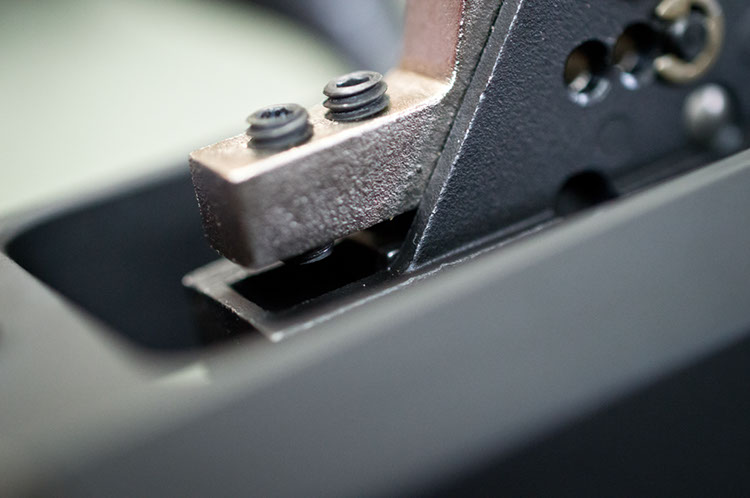 Step 7: If you're us, step seven is when the massive disappointment hits that your sear and oddly cut trigger engagement point will not play nice together for love nor money. For normal people, step seven is to double check these two screws on the rear of the trigger. One limits the trigger's overtravel, and the other prevents it from moving when the safety is engaged. Obviously, the latter of is of the utmost important, and although we were not entirely happy with the other adjustments we made sure to get this one perfect!
Step 8: Since we were hell bent on getting this gun to the range, we then double checked everything was fastened down tightly, and put the chassis back together around the action. Since we have that great ADM mount, we avoided the whole rigmarole of re-mounting the optic, and with the rifle fully laden and cocked(with an empty chamber of course), we set about bouncing it off the floor off the buttpad. Once we were satisfied that the trigger would not go off unduly, we packed it up, grabbed some ammunition and headed to the range.
Which brings us to step nine; the range day and our first project rifle's real test. In order to get the trigger to pass that all-important drop test we actually had to dial in more spring tension and more sear engagement than really should be necessary, so our trigger was inconsistent at around 2 pounds, and actually quite gritty and creepy as we dragged the trigger off the sear with every shot. Sure it's probably better than say, a stock Stevens 200 trigger, but given the quality of the trigger we'd purchased and Rifle Basix' claims that it could deliver a four ounce pull we were disappointed.
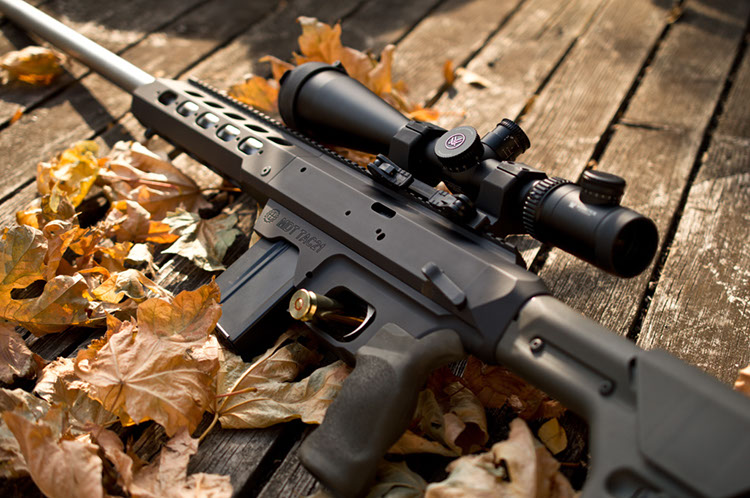
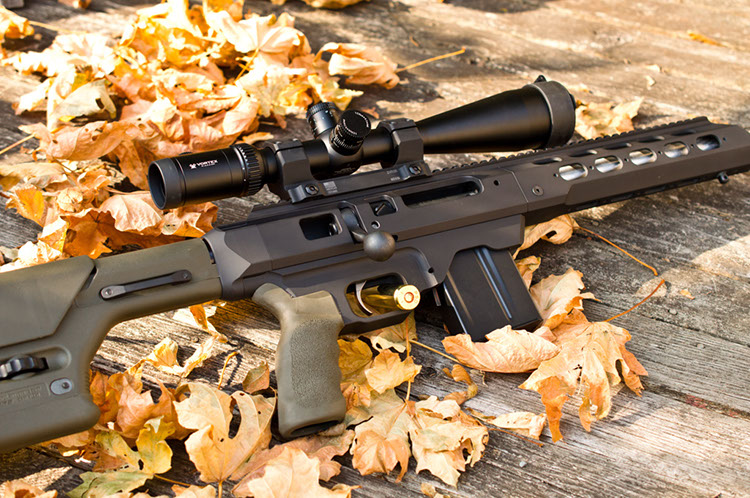
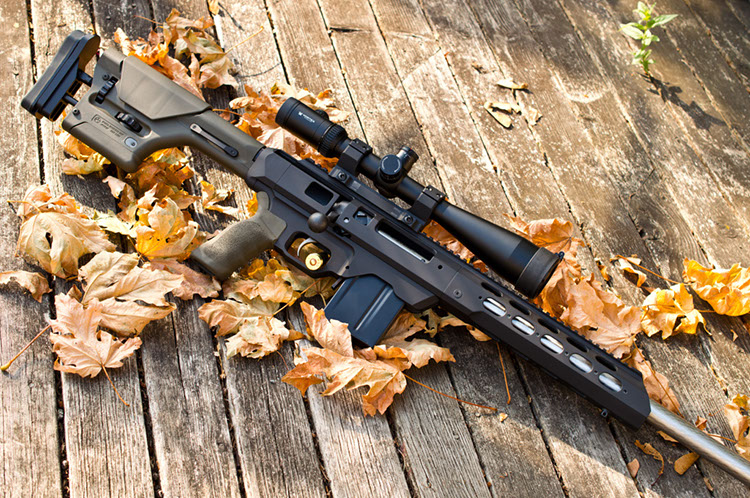
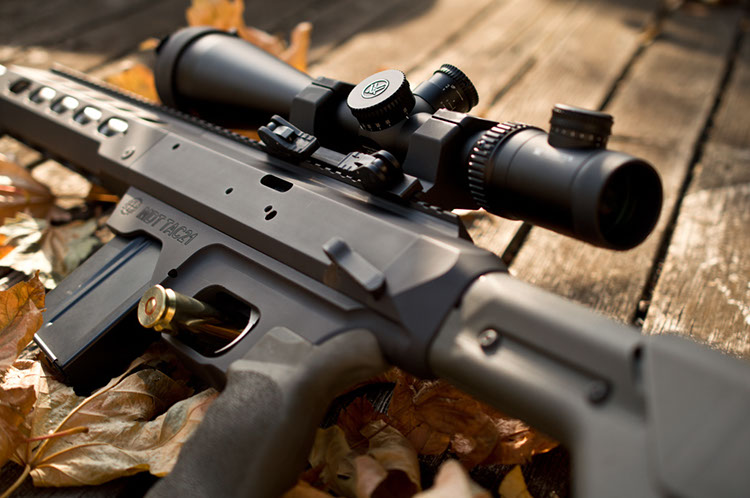 Nonetheless, it didn't seem to hurt the rifle's performance. We won't bandy about; shooting factory Remington Premier Match and Federal Gold Medal Match 175 grain loads, it recorded a best group of 0.78" with five rounds with the Federal product and only marginally larger with the Remington. And that wasn't even difficult... but that was hardly an accident. Fitted out as it is, this rifle is an absolute pleasure to shoot, and a key component to marksmanship is staying relaxed behind the gun. To that end, the chassis from MDT is wholly to credit for much of the performance this gun puts up. Putting all the recoil forces in line, allowing the use of such a fantastically adjustable stock as Magpul's PRS (to say nothing of MDT's own even-more-adjustable recoil pad), and giving a great and ergonomic grip, this chassis really lets the shooter get comfortable behind the gun. Properly set up, you could damn near fall asleep on the thing. And while we're at it, we feel it's worth mentioning some of the merits of our 30" bull barrel. While the primary purpose behind buying it was to provide us with a better rifled tube to send projectiles down range (not to mention give us a gun in the right damned calibre!), we'd forgotten how pleasant it is to shoot .308 out of a barrel that long and that heavy. Having grown used to the unpleasant concussive effect created by 22" barrelled and heavily muzzle-braked M14s, this thing was a downright pussycat by comparison. The sound-dampening alone was worth it!
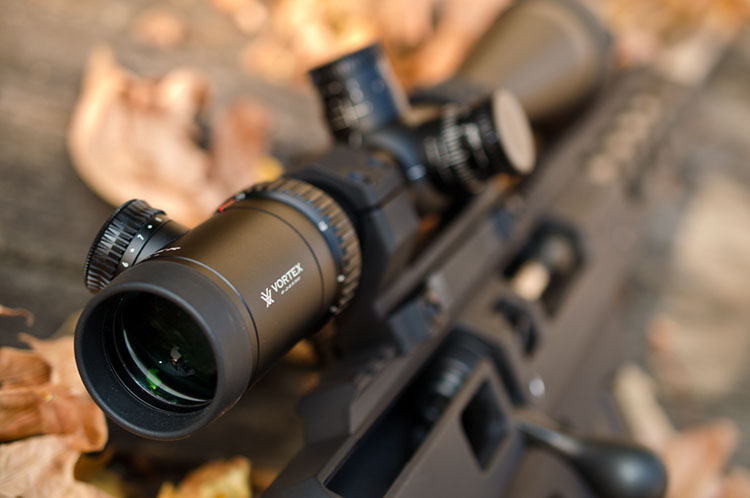 And then there's the glass. Vortex's Viper PST may not be cheap, but it's a bargain compared to a lot of the scopes it stacks up against feature-wise, and having now shot with it we can definitely say that for at least 75% of the shooting population it's probably the best choice. It is very solidly made, very clear, and that reticle is just excellent. To be blunt it felt like it was almost utterly wasted at the paltry 100 yard distance we conducted our testing it. If you have any interest in long-range shooting, and doing so on something even remotely resembling a budget, buy one of these. By the time your skill set outgrows the optical performance it provides, you will have had plenty of time to save up for a move upmarket.
When we set out to build this rifle we did so with a relatively simple pair of goals: build it with parts that gave some of the best return on investment possible, restrict the build to parts and processes that could be accomplished without the assistance of a gunsmith, and do so in a manner that allow it to be enjoyed and shot as it was being built. The logic behind that was to provide readers with an idea as to what sort of rifle could be assembled, piece by piece, with zero downtime. Obviously we were somewhat waylaid by getting a rifle in a calibre other than what was advertised, to say nothing of our trigger woes, but at the end of the day we're happy with the result. It's hard not to feel a certain sense of pride in putting together a rifle, in a garage, that should be capable of damn near half-MOA performance. And it's definitely something we'd do again. In fact, we already are, but you'll have to wait for the next issue to find out more about that!

 SUBSCRIBE TO CALIBRE MAGAZINE
$30.00 / year
SUBSCRIBE TO CALIBRE MAGAZINE
$30.00 / year
 UNAPOLOGETICALLY CANADIAN MEN'S T-SHIRT
$29.00
UNAPOLOGETICALLY CANADIAN MEN'S T-SHIRT
$29.00
 UNAPOLOGETICALLY CANADIAN WOMEN'S T-SHIRT
$29.00
UNAPOLOGETICALLY CANADIAN WOMEN'S T-SHIRT
$29.00