Have you ever wanted to paint something, but haven’t been entirely certain you’ll like the result? Well, we’ve gotten some crap about our two-tone project rifle’s hodgepodge of Cerakoted black parts clashing with our chosen olive drab furniture, and we’re sick of it... but we definitely don’t want to put that beautiful and tough Cerakote at risk just to be fashionable. So, enter Plasti Dip.
A unique spray-on rubber coating that is applied like paint but can be peeled off quite easily in large sheets like a vinyl wrap or a protective latex coating, it’s immensely popular in the automotive and motorcycle markets, and has already proven itself resilient to oils and heat in those applications... so does it work well on guns? Well, there’s only one way to find out.
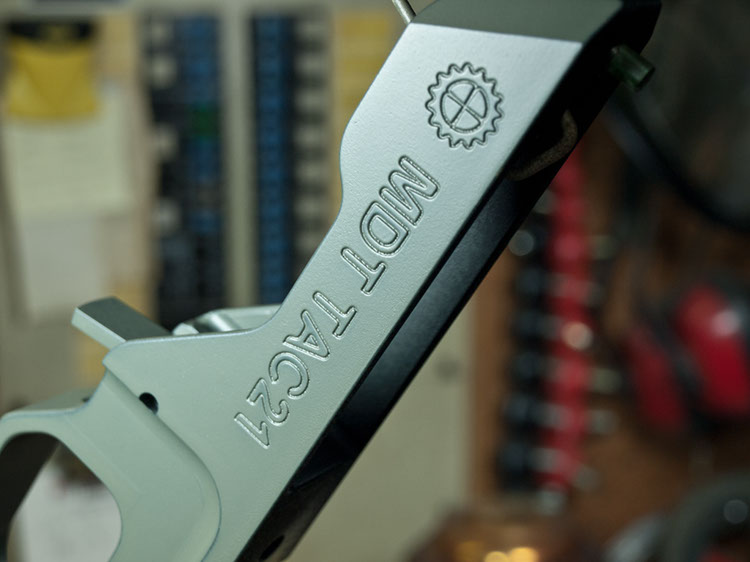
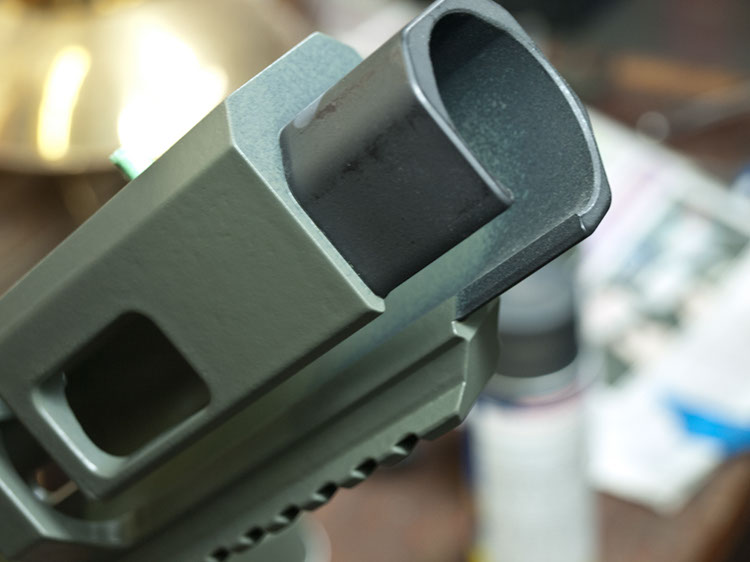
 Here’s the stock Cerakote finish. Certainly one of the best coatings out there for firearms, Cerakote’s a baked-on ceramic coating that is pretty much impervious to any and all solvents, and can take one hell of a beating. In fact, you could probably paint over it and simply dip the whole thing in paint thinner to remove it, but that’s certainly a lot more difficult than peeling a coating off, and messy.
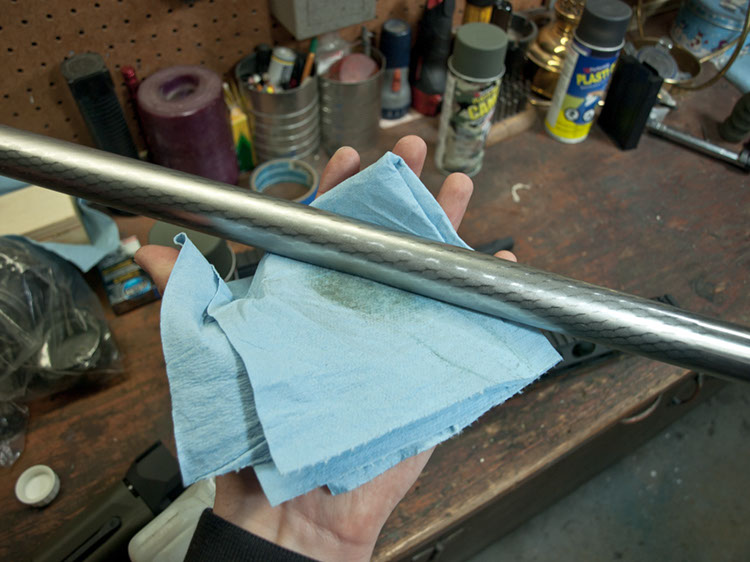 The first step in any decent coating application is to ensure that the surface of your substrate is as clean as possible. Given the durability and chemical resistance of our gun’s Cerakote and stainless steel finish, we used simple acetone but this may be too aggressive for other finishes. As you can see, while the stainless barrel looked plenty clean, it definitely wasn’t as that brown patch was the result of a mere few seconds’ scrubbing.
 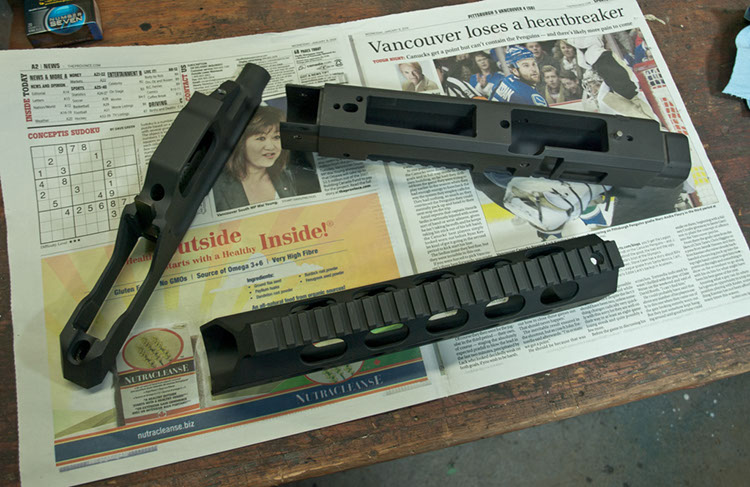 Once all the pieces to be painted are cleaned, ensure that they remain that way by placing them on something similarly clean, such as paper towel or a sheet of newspaper. From now on, keep handling to a minimum as well, as skin oils can contaminate the surface. We prefer to use the sports section as we’ve found it to be the best way to cover up the never-ending heartache of the Vancouver Canucks’ performance.
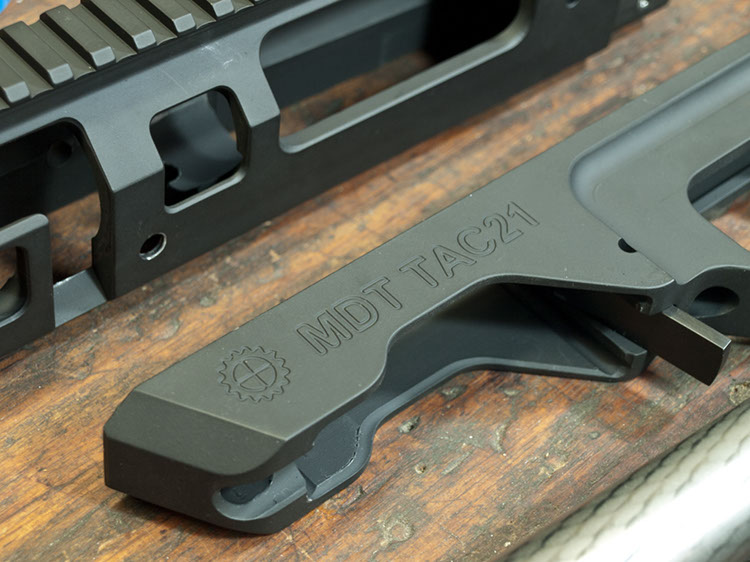
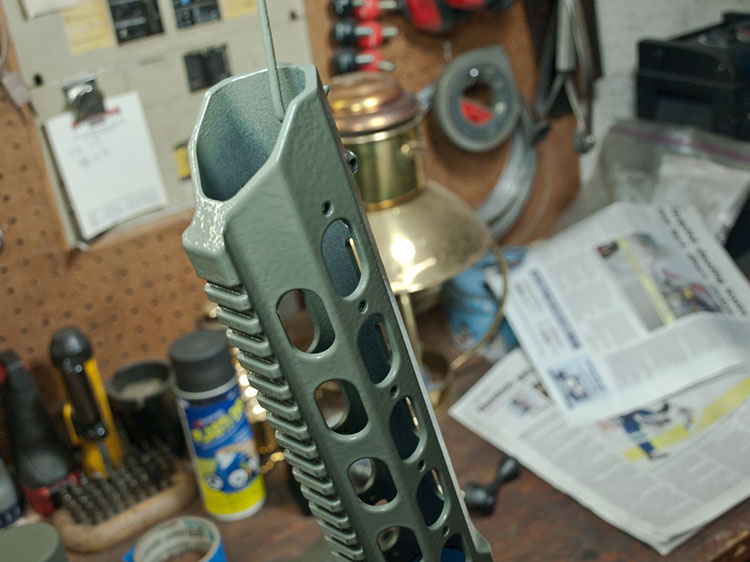
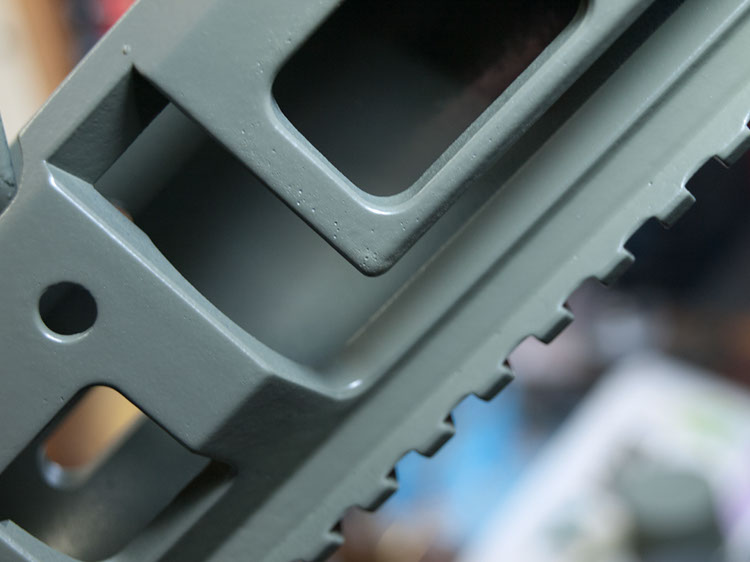
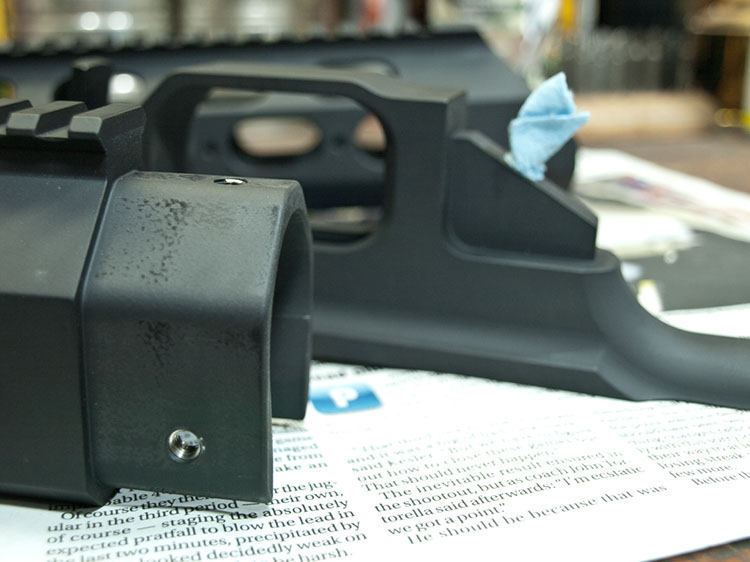 Here you can see how precisely made the MDT parts are. That’s the inner sleeve of the receiver portion of the chassis, and it mates so closely with the fore-end that you can make out the high spots on the finish by the glossier wear produced by their assembly and disassembly. Obviously, you do not want to spray such parts in a thick coating of anything, so its wise to mask them off before beginning.
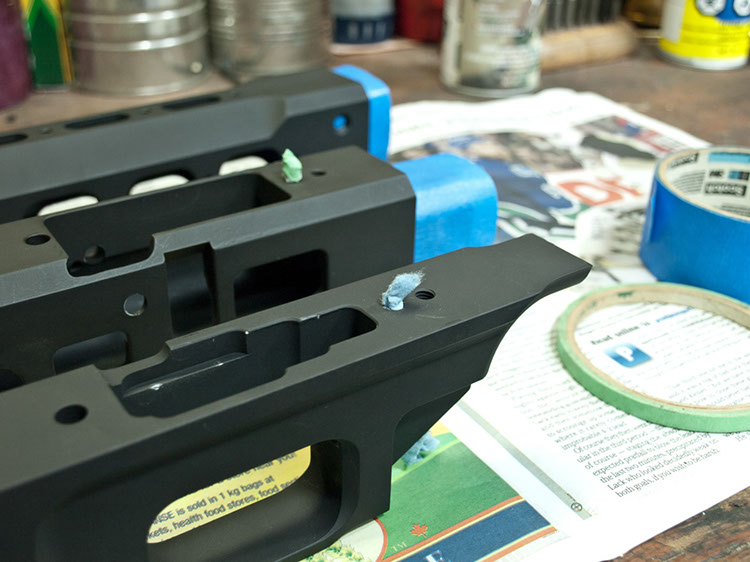 With any coating, it’s very important to keep paint from coating any locating pegs, and ideally, threads. It can bind the pegs up and make them difficult to work with at best, and even worse, can get scraped off during the assembly process and build up a shoulder that holds the surfaces apart. Mask them off with tape (background), and stuff any locating or threaded holes with paper towel.
 Finally, take one last look at the pieces for any debris on the surface, such as these fibres left behind by the paper towel used to wipe the part down with acetone. For this exact reason, it’s important to have a rag on hand that’s clean, and that won’t lose fibres. If you happen to have one, a tack cloth (a sticky piece of cheesecloth used primarily in autobody and painting) works well good too.
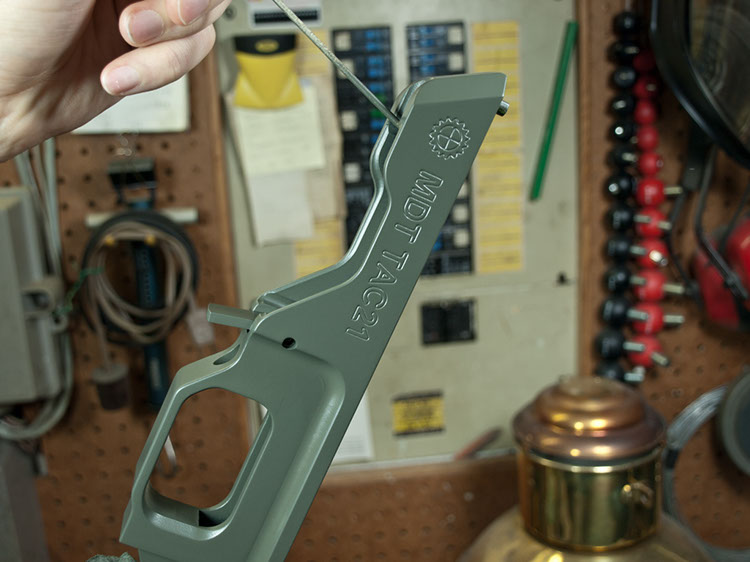
 With the prep work done, we used bent coathangers to hang the pieces for painting. Now, with Plasti Dip, the thickness of each coat will greatly effect the end result. Lots of thin coats will give a rougher, more pebbly finish, while a few thick coats will give a smoother finish. The important part is to make sure the cumulative finished product is thick enough to have the strength to peel off easily.
 We opted for the thicker coats in order to get a smoother finish, and this is what our first coat looked like after 20 minutes. Beware, if you’re used to conventional paint this stuff is very different and to be blunt, it looks like utter crap when you first spray it on. But it does have some incredible self-leveling properties and it smoothes out nicely over its short drying time. Just hold the faith and it’ll work.
 Did we mention that it looks like crap when it’s first sprayed on? It builds quickly, but is very thick, so it doesn’t really sag or run noticeably and instead just leaves a lumpy, weird coating. On the upside, it’s heavy enough that overspray isn’t much of a concern; most of it will hit the ground rather than a wall or backstop. And for the record, we used almost an entire $15 can of olive drab.
 Now you know why we panicked. Just keep the can roughly 6-8 inches from the surface and move it smoothly across the piece. Also, keep the can warm because we noticed quite a bit of variation in consistency when we left the can in the cold garage between coats versus bringing it inside. And shake it frequently too; the colour seems to settle out inside the can faster than traditional paints.
 If you can believe it, this picture was taken just 40 minutes after the previous one. After just two coats, the thickness of the overall finish on flat portions was sufficient, but was still quite thin on the various corners. We applied two more coats after this to ensure good coverage everywhere, because unlike paint, if it is marred on an edge it will begin to peel rather than just chip in that one area.
 With the final coat freshly on, it’s very important to peel any masking tape off immediately. If the Plasti Dip is allowed to dry beforehand, the masking tape will take a bunch of the coating off with it, and we actually found the edge of the tape actually did bring some of the coating with it, even after just a few minutes. Be careful though; a wayward finger in a coated area can ruin a finish!
 Now, in our attempts to get away with a few thick coats, we did overdo it slightly. Those small bubbly pinholes are evidence of the Plasti Dip being applied too thickly, and appear in a few spots on the chassis, primarily in areas where the coating pooled slightly before drying. Admittedly, we did bring the can in too close in our attempts to coat all the various angles on this receiver portion.
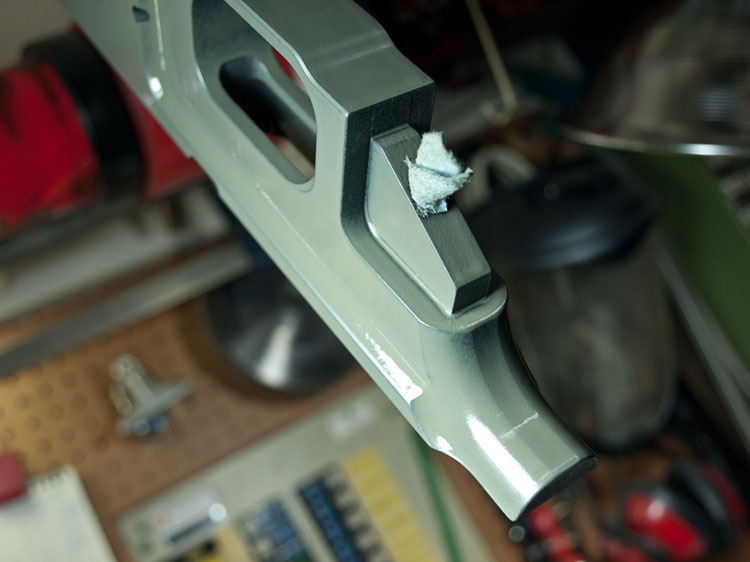
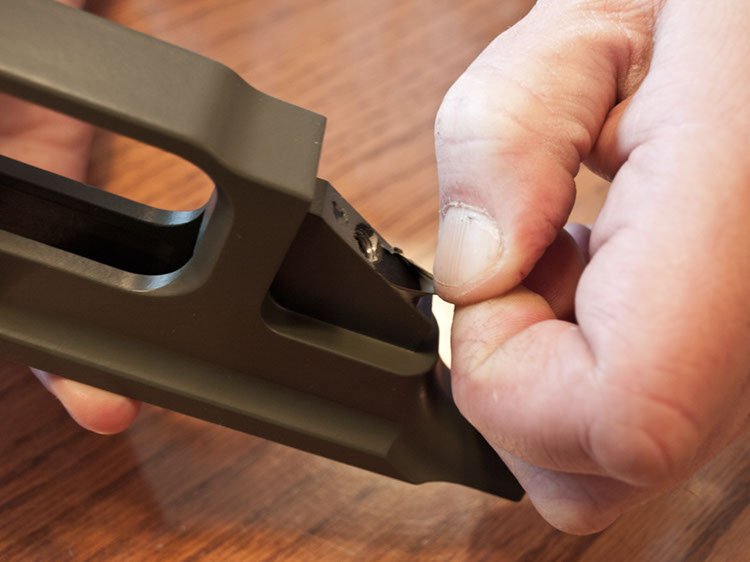 But, after all that, it definitely does peel off. Allowed to dry overnight, we peeled it off this area beneath the pistol grip and found it incredibly easy to remove. Just lightly score the area around the portion you want to peel and it comes right off. In fact, it’s so easy that when they paint cars with this stuff, they don’t even mask over the headlights; they just paint over them and peel it off after!
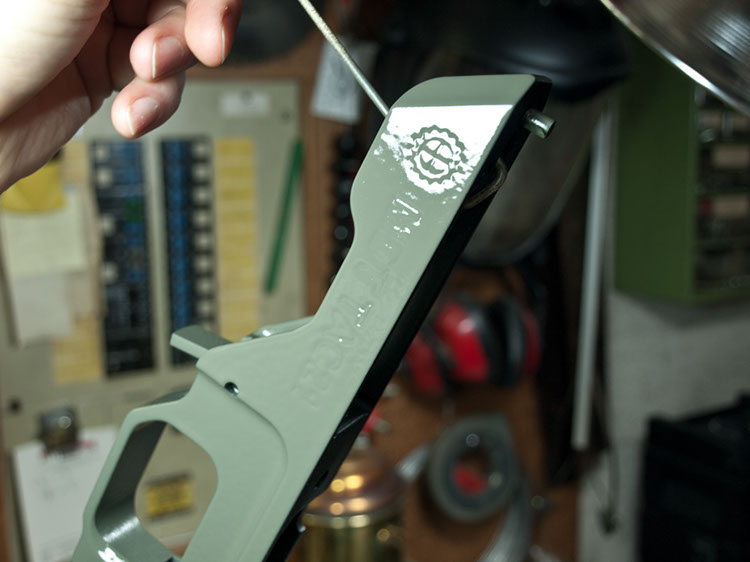
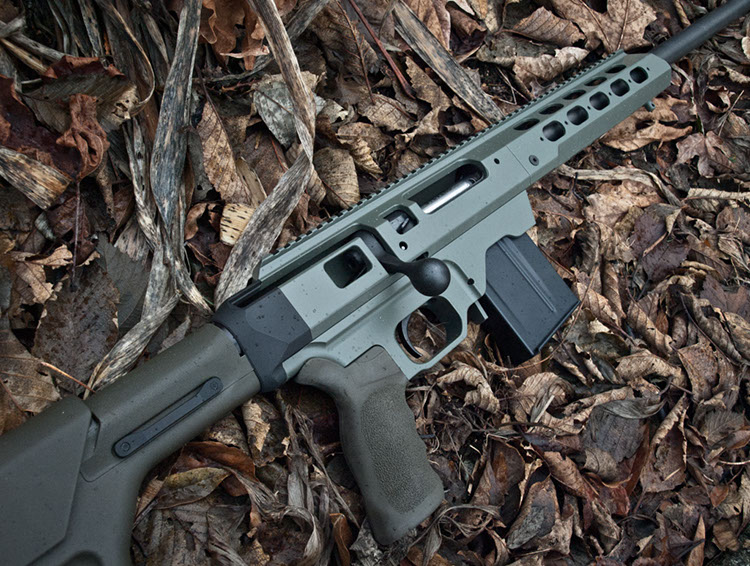 And here’s the finished product. It looks very good overall, and the ability to remove (and replace it!) on a whim is comforting, and has us thinking about experimenting with some camo schemes. As you can see here too, the translucent “Smoke” Plastidip we used on the barrel worked quite well to dull it’s the stainless finish while still allowing the unique blasted finish to shw through. But it’s not perfect; this coating is not all that tough. In fact, if you handled your gun a lot you can expect to reapply it probably twice a year. Also, it’s tacky, and not in a leg-lamp kind of way: being a rubber-based product, it has a certain degree of stickiness to it. For that reason, it’d be well suited to handgun frames or tactical guns, where the rubber can grant increase grip all over but it definitely won’t be to everyone’s tastes.

 SUBSCRIBE TO CALIBRE MAGAZINE
$30.00 / year
SUBSCRIBE TO CALIBRE MAGAZINE
$30.00 / year
 UNAPOLOGETICALLY CANADIAN MEN'S T-SHIRT
$29.00
UNAPOLOGETICALLY CANADIAN MEN'S T-SHIRT
$29.00
 UNAPOLOGETICALLY CANADIAN WOMEN'S T-SHIRT
$29.00
UNAPOLOGETICALLY CANADIAN WOMEN'S T-SHIRT
$29.00