It's a term we've all heard before: buyer beware. Maybe you first heard it from your father's unimpressed lips while looking over a particularly suspect first car as a youngster, or maybe you've said it to someone yourself, but regardless of context it's a term that'll never fall out of favour. And it's a term we'd have done well to heed a few months ago, when we bought a used Stevens 200 as a project gun from the Gun Owners of Canada forum. Because while we thought we were buying a moderately fussed-with Stevens 200 in .308 Winchester, what arrived at our doorstep a few hundred dollars and about a week later, wasn't. Oh sure, it was a Stevens 200, and yes indeed it had been privy to a few modifications, but it also sported an unexpected ".243 Win" roll mark on the side of the barrel.
So, throwing a wrench into the works in a mildly large way, this unforeseen issue created an obvious problem when it came to meeting the original schedule laid out for this particular project, and meant that what was supposed to be one of our last steps would have to become one of our first: replacing the barrel.
Now, that being said, getting a gun of the wrong calibre was hardly the end of the world; part of our decision to base this project off a Stevens 200 action was the ease with which the barrel can be replaced without the aid of a gunsmith. Essentially amounting to little more than a basic Savage action with a slightly lower-rent finish, the Stevens 200 action uses the same lock-nut system of barrel retention as most Savage bolt-action rifles, which means you can literally thread barrels on and off without little more than basic hand tools.
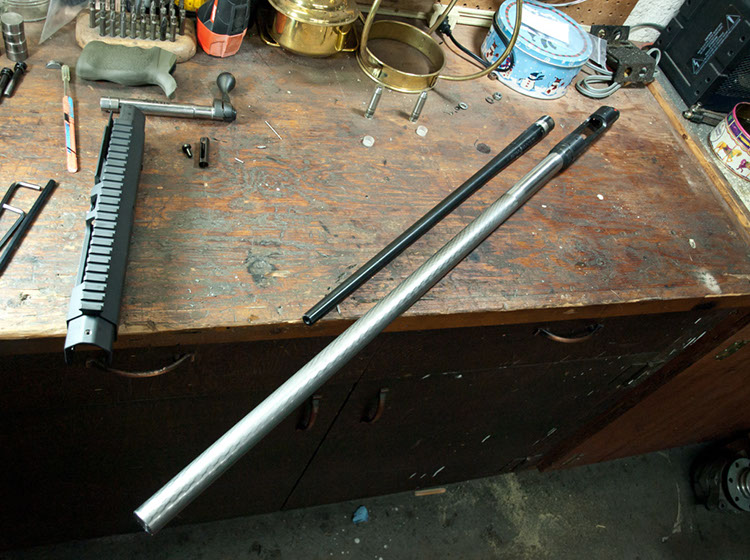
Of course, before you can grab those basic hand tools, you obviously need a new barrel. After perusing the Gun Owners of Canada forum to no avail, we emailed Jerry Teo of Mystic Precision; a reseller of high quality long-range barrels, triggers, stocks, and other such equipment. As it turned out, he had a spare Shilen Stainless Steel Select Match bull barrel in .308 Winchester kicking around; a back up barrel from his efforts in international F-Class competition. After making ourselves $300 poorer, we were the happy new owners of a very pretty, very fancy metal tube.
But the purchasing didn't end there. While the process of replacing the barrel on a Stevens or Savage rifle may be far less labour intensive than that of a Remington or Mauser-style rifle, it still requires at least two specialty tools: a Savage barrel lock nut wrench, and a set of headspace gauges also known as "go/no-go gauges." Both can be difficult to find on the shelf at many Canadian retailers, but are completely uncontrolled for either export or import and can be ordered from US online retailers easily; we found ours on Amazon for $24 and $60, respectively. Also, if one plans to make a habit of replacing their rifle barrel, purchasing some sort of action wrench may also be a wise idea... however, if it is going to remain an infrequent process, it can be usually be done without that $60-80 tool.
 As with all firearms-related tasks, the first step is always to ensure that the firearm is unloaded and safe to handle. Furthermore, ensure that your work space is at least marginally clean, and (importantly) free of other gun parts, and ammunition. Then, assemble the tools you'll require to complete the task, which in this case requires a wooden block, some duct tape, the barrel nut wrench, an appropriately sized breaker bar, a deadblow hammer or mallet, a set of Allen wrenches, a small screwdriver, and the set of headspace gauges specific to the calibre of barrel you will be installing.
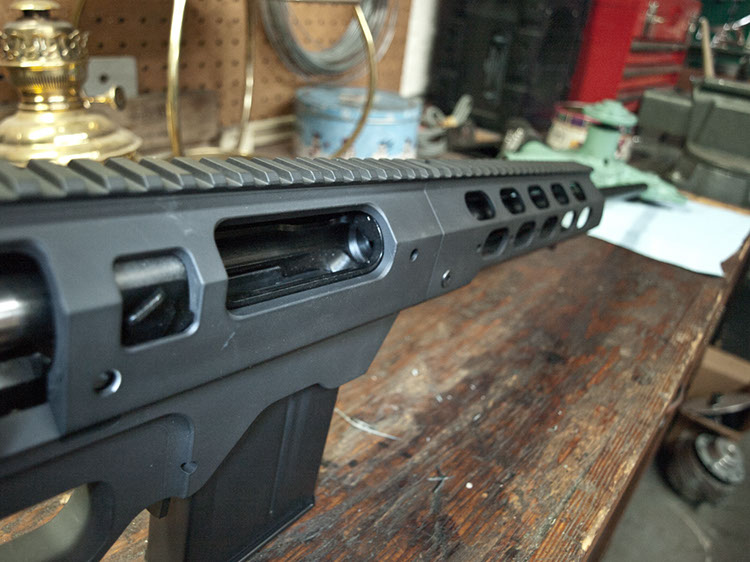
 Next, we needed to go through the process of removing the barreled action from the MDT chassis. Simply the reverse of the process we covered in the previous issue, the only thing to beware of is to keep as many of the trigger parts captive as possible while removing the action from the chassis, and not to be overly gentle with the main trigger takedown pin. By virtue of the chassis being drilled with one hole off centre to prevent the pin from walking out, cajoling it from the chassis took a decent tap from a small hammer to clear it's head from the offset hole.
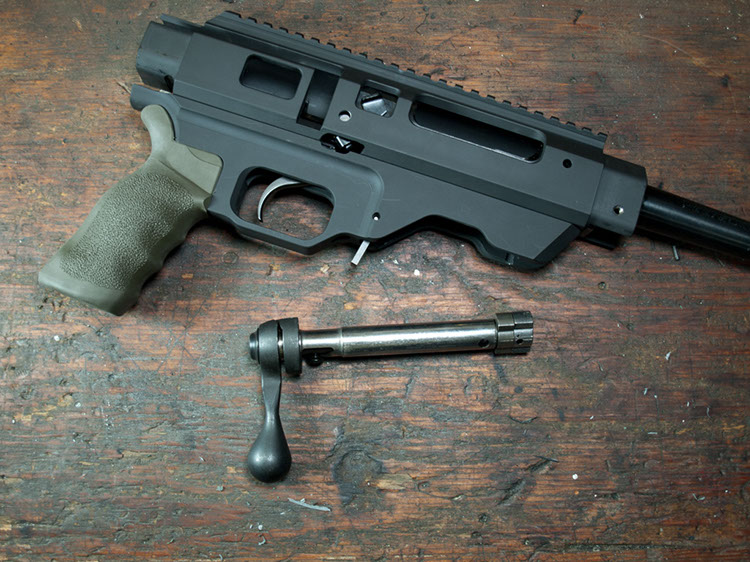
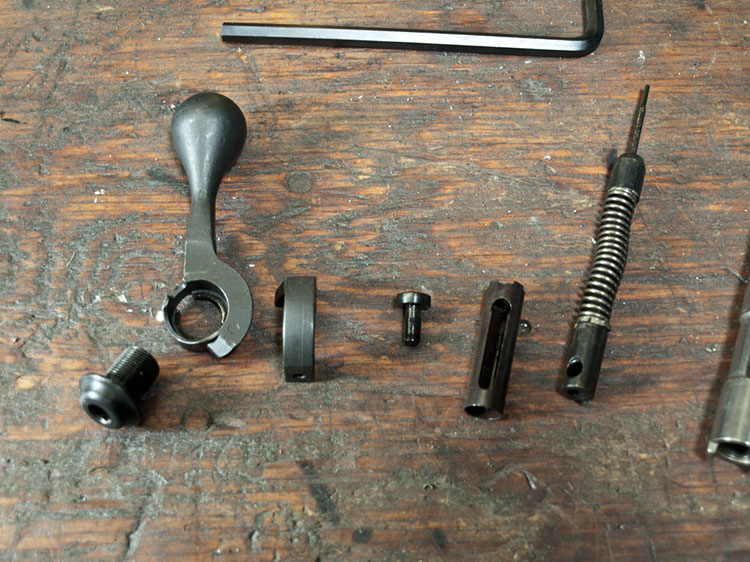
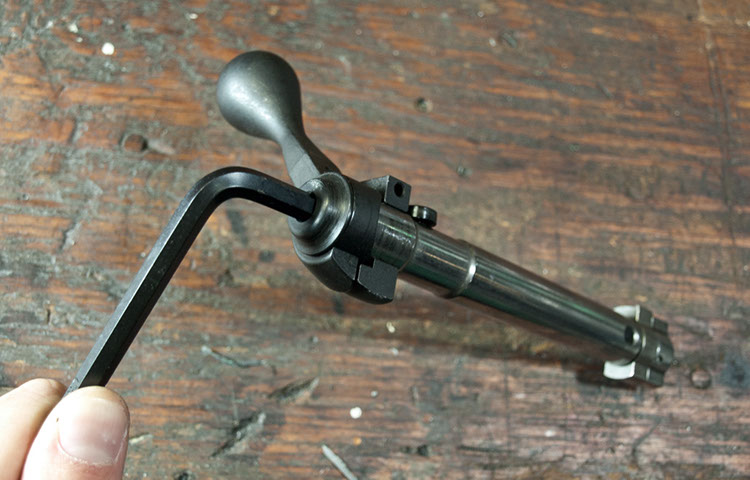 Once that was done, we needed to disassemble the bolt. This is accomplished by removing the screw from the back of the bolt, taking off the handle and baffle, and removing the firing pin. This is accomplished by aligning the sleeve at the back of the firing pin/striker assembly in such a way that the cocking pin can be pulled free of the bolt assembly, hereby allowing the cocking sleeve and striker assembly to drop free of the bolt body, leaving just the bolt head and ejector to deal with.
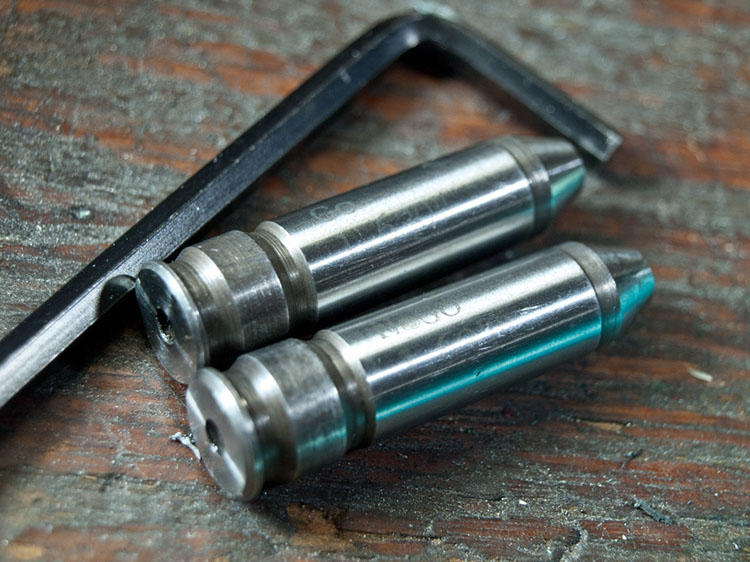
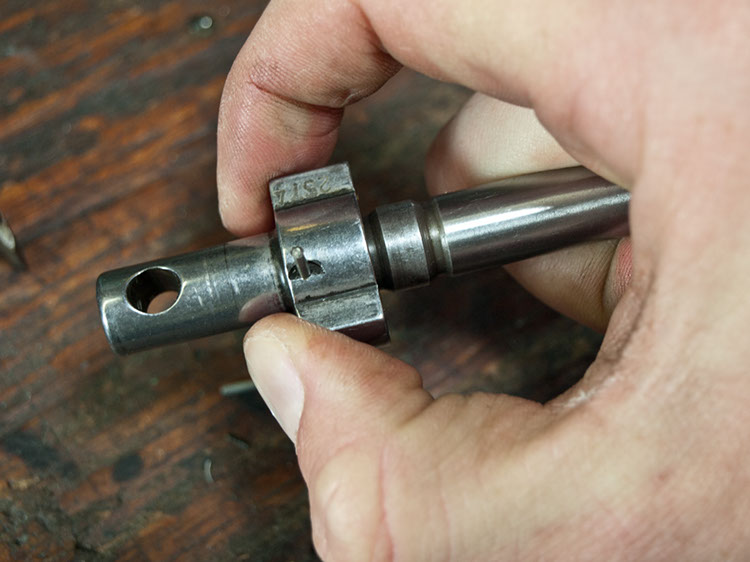 The first step in dealing with the bolt head is to put rearward pressure on the bolt head, compressing the spring steel washer that allows the bolt head to float on the body. Then, push the bolt head retaining pin out, and remove the bolt head from the bolt body. The ejector is retained by a simple 1/16th of an inch pin, and we pushed ours out with a cheap disposable drill bit of a corresponding size and the judicious use of a small hammer. Then we used a headspace gauge to depress the ejector in order to take the pressure off the drill bit for removal.
 Once the ejector has been removed, the bolt can be partially re-assembled. Install the handle and baffle, the firing pin/striker assembly (without the cocking sleeve installed though), and the bolt head with spring steel washer included. Of note, while some claim it's best to keep the firing pin out to ensure it doesn't protrude from the bolt face and interfere with the headspace, it is required to retain the bolt head retaining pin, which can lock the action closed if it walks out. And with the cocking sleeve out it will not protrude.
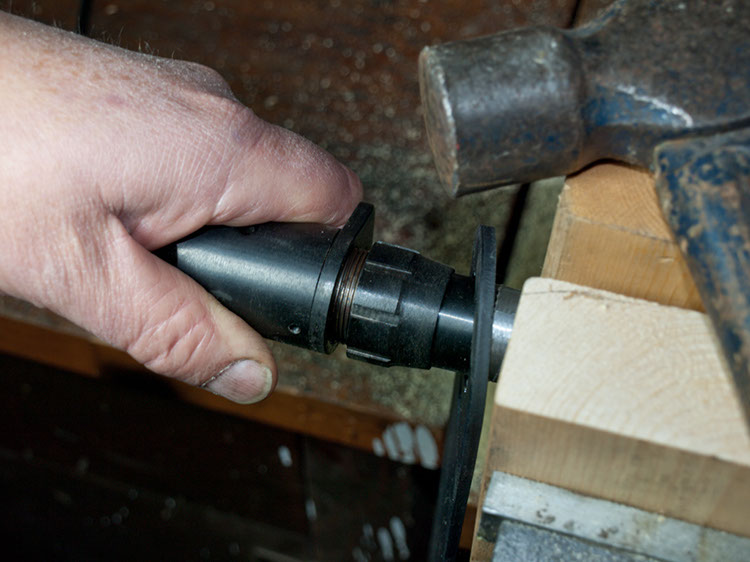
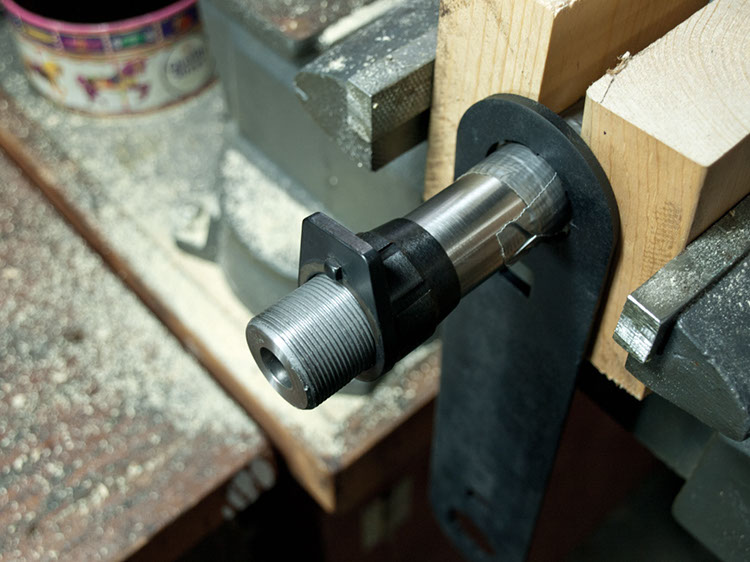
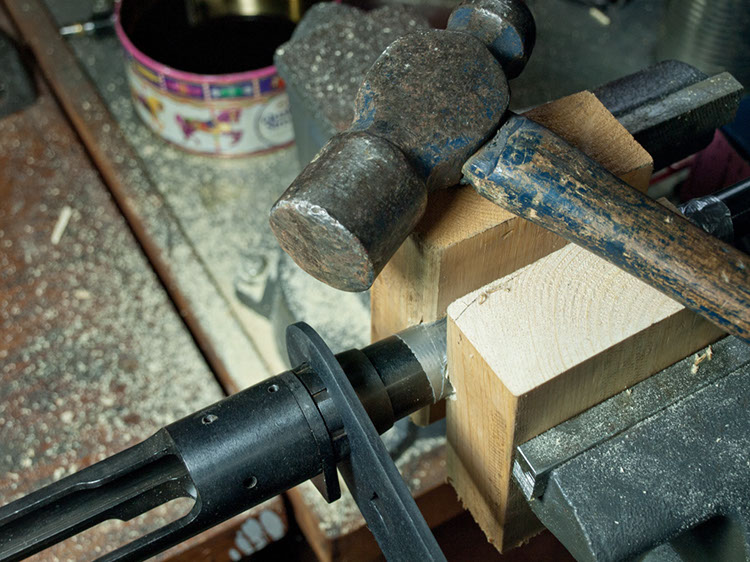 Now it's time to start on the barrelled action by making a barrel vise. Grab two blocks of wood (don't agonize over lumber, but maple works well) and notch each of them across the grain to a depth approximately 45% of your barrel's diameter. Then, wrap the barrel in duct tape to protect its finish, and slide the barrel lock nut wrench onto the barrel lock nut. Put the barrel into your makeshift barrel vise, and squish the two wooden blocks around the barrel, hard. Then, grab your mallet and try and whack it the lock nut loose. Don't be gentle.
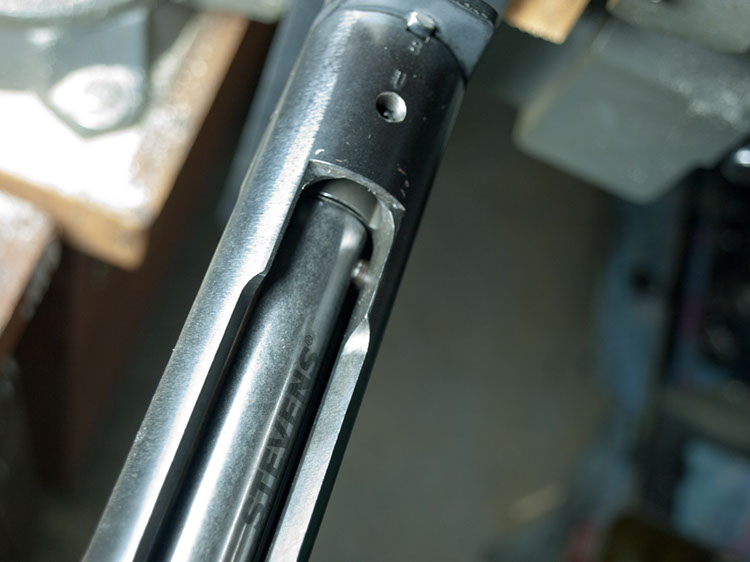
 With the barrel nut backed off, the action can be simply be spun off the back of the barrel shank, and the barrel removed from the vise. Savage and Stevens both use a form of thread sealant in the barrel threads to keep finishing chemicals from leeching into the join , so you'll be well served to clean the threads in the receiver and the barrel lock nut with a brush and some solvent before continuing. Then, apply some anti-seize compound to the shank of your new barrel and thread the barrel nut completely on.
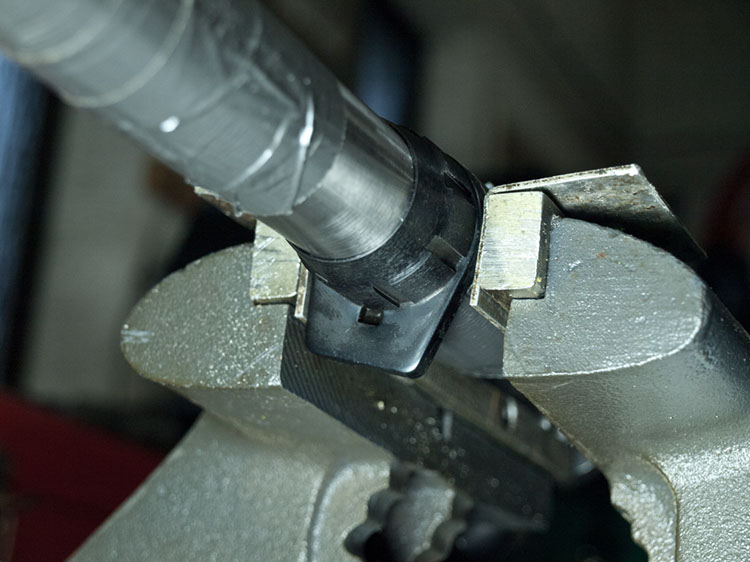 Then, continuing the DIY approach, wrap the very fore of the action in a single wrap of duct tape, and lightly clamp it between a pair of soft jaws as pictured so that any tightening motion forces the recoil lug into one of the vice jaws. Then, slide the recoil lug onto the new barrel shank (correctly oriented, of course!) and start threading the barrel into the receiver by hand. Once it's been threaded partially in, put the "Go" headspace gauge on the bolt face and slide the semi-assembled bolt home.
 Continue to thread the barrel in by hand until you feel it bump against the headspace gauge. Then, working to thread the barrel inward and outward while simultaneously working the bolt, try and get the barrel threaded in to the point where there is little resistance as the bolt handle begins to drop, increasing slightly as it hits the bottom of its travel. One tip though, as you get close, have someone support the barrel as you work the bolt to take any droop out of the equation.
 Once you have it in a position that feels correct, hold the barrel still and snug up the barrel lock nut lightly by hand; just enough to take up any slack. Then, test the action again for friction. Chances are you will find it's overly loose again. Keep playing with it until the lock nut is snug, and the correct amount of friction is felt as the bolt is rotated into battery. Then, remove the bolt and "Go" gauge and ensure the action does not close on the "No Go" gauge. Double check the recoil lug is properly fitted into its corresponding slot.
 If it doesn't, insert the "Go" gauge once more, and test it one last time. Then, ensuring the barrel doesn't turn, tighten the barrel lock nut with the lock nut wrench. How much? Well, you can simply repeat the same method by which it was removed and whack it tight with a hammer, but we preferred to use a torque wrench. Using the 1/2 drive socket nearest the action, torque the barrel lock nut to roughly 40 foot-pounds. Once that's done, test the headspace again with both gauges, just to be safe, and admire the difference between the old and new barrel.
 Then, remove the bolt and headspace gauge, and start reassembling the bolt in its entirety. This is a good time to clean it off and lubricate all the various mechanisms from the cocking piece to the striker assembly, and change the bolt handle if you prefer a larger one. When finished, be mindful to place the cocking piece in the position pictured, as the bolt cannot be reinstalled into the rifle with it in any other position. After that, begin the process of reinstalling the barrelled action back into the chassis, beginning with the trigger mechanism.
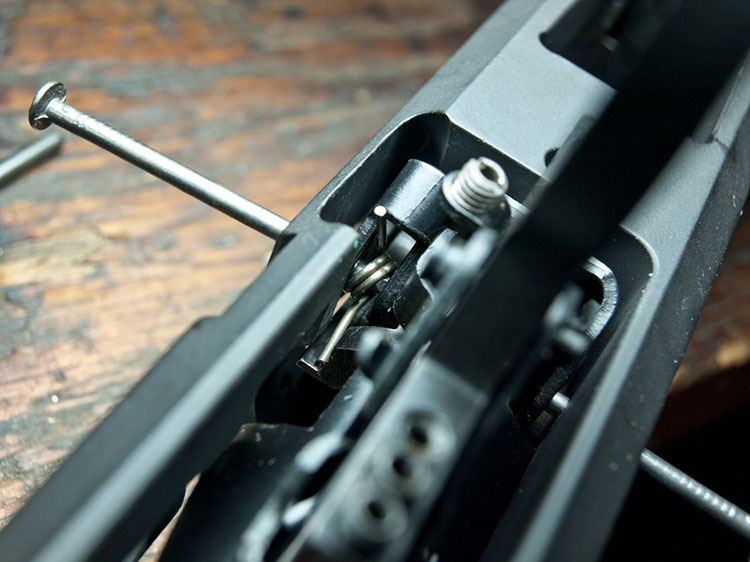 Speaking of, while we demonstrated one method of attaching the trigger to the action in the previous issue, much frustration continued to follow this time and resulted in the discovery of a much easier method. Stick one 2" nail through the receiver on the bolt release side, using its point to align the bolt release spring, and then push that nail out with another 2" nail from the other side, transferring the spring from one nail to another another. Then, finally, insert the retaining pin on the bolt release side and push the second nail out the other side.
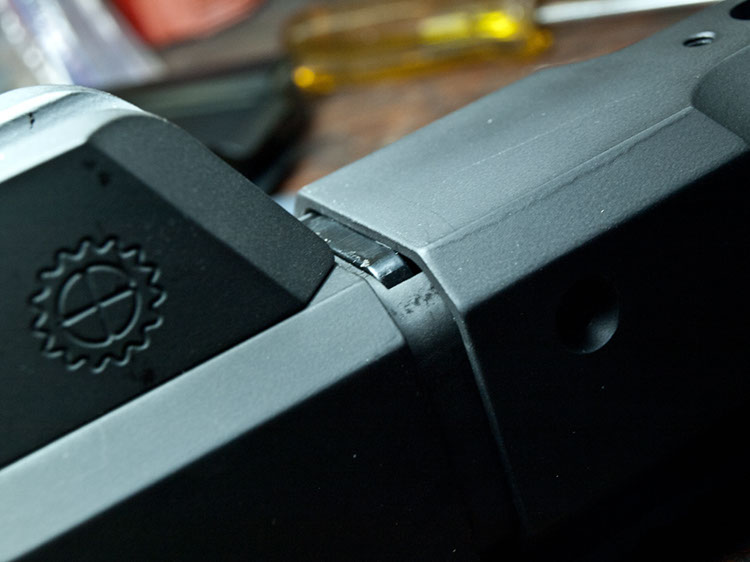 Finally, do a quick function test, and then set about bolting it all back together. And beware this particular gremlin when you do: due to large variances in the length and thickness of stock Savage/Stevens recoil lugs, the recoil lug on ours stretches slightly too far down, and prevents the fore-end from fitting over the main chassis. It's easily remedied with a little time with a file, and could possibly be entirely prevented by installing an aftermarket recoil lug manufactured to higher tolerances, which in some cases can make for a more accurate gun.

 SUBSCRIBE TO CALIBRE MAGAZINE
$30.00 / year
SUBSCRIBE TO CALIBRE MAGAZINE
$30.00 / year
 UNAPOLOGETICALLY CANADIAN MEN'S T-SHIRT
$29.00
UNAPOLOGETICALLY CANADIAN MEN'S T-SHIRT
$29.00
 UNAPOLOGETICALLY CANADIAN WOMEN'S T-SHIRT
$29.00
UNAPOLOGETICALLY CANADIAN WOMEN'S T-SHIRT
$29.00